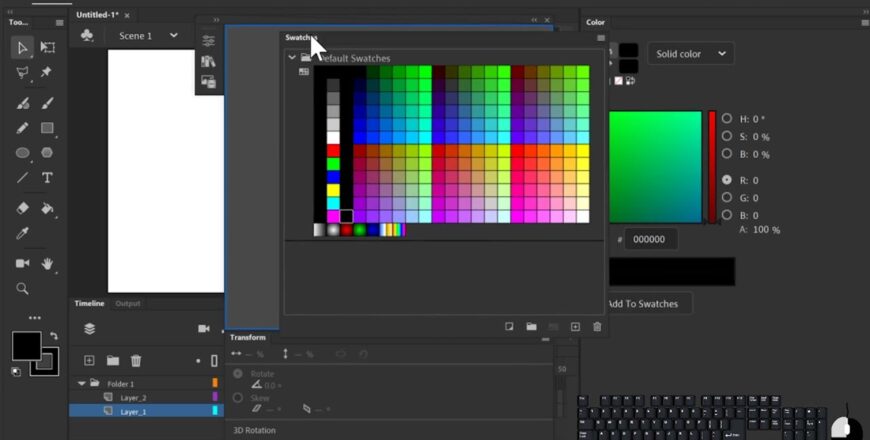
Adobe Animate Beginners Guide
- Description
- Curriculum
- Reviews
Adobe Animate is a vector graphics and interactive animation software that assists businesses in creating vector graphics and interactive animations for television series, websites, game development, and other projects. Graphic designers can use it to create banner ads, animated doodles, and avatars, as well as embed audio files and add animations to eLearning courses and infographics.
Adobe Animate enables employees to publish content in multiple formats across various online platforms, as well as create augmented reality (AR) animations and game environments. It also has a content library, digital asset management, a drag-and-drop interface, video editing, and other features. Designers can also use live brushes to sketch and draw characters, and then use frame-by-frame animation to make them blink, talk, and walk.
Learning Objectives
1. Getting to know the workspace
2. Working with elements
3. Adding motion
4. Creating Graphics and Importing Art
5. Designing Animation
6. Refining Animation & Adding Complexity
7. Adding Basic Interactivity
8. Embedding Media and Advanced Interactivity
9. Publishing and Responsive Design
-
1Getting started with Adobe Animate User Interface11 minutes
1. Selection, Transform Section Tools
i. Selection Tool: This instrument is the most used instrument in the toolbox and is called the Arrow key. A tool for selecting one or more objects on the stage is used. When an item is picked, naming, repositioning, resizing, and otherwise modifying it is possible. This tool can be used to add a vector line curvature.
ii. Sub Selection tool: To adjust a line-section drawn with the pen tool, either straight or curved.
iii. Free Transform tool: Used in turning, scaling, skewing and distorting items. On the bottom left of the instrument, the tiny triangle shows a sub-menu.iv. 3D Rotation: Used to spin icons and turn them along with a 3D matrix.
v. Lasso tool: Draw a choice freehand zone to select items.
2. Drawing Tools
i. Pen Tool: Draws precise lines or curves.ii. Text Tool: Used to produce SMS files and tags for entry and export.
iii. Line Tool: Makes a straight line of vectors.
iv. Shapes Tool: The base forms like rectangles and rectangular vectors are created. The forms may be filled or unfilled. This instrument has a submenu with other forms, like a polystar and a rectangle.
v. Pencil Tool: Draws vector forms freeform.
vi. Brush Tool: Makes pen movements freeform.vii. Deco Tool: Used to produce advanced designs and fillings, especially a model of flower and leaves.
3. Modification Toolsi. Bone Tool: Used for 3D animation building.
ii. Paint Bucket Tool: Used to complete a filling color in any confined region.
iii. Eyedropper Tool: Used to collect and duplicate a hue from another item on a dye detector.
iv. Eraser Tool: Erases drawings of vectors.
v. Spray Brush Tool: Spray paints throughout the phase the library’s film clip icon.
4. Viewing Toolsi. Hand Tool: In the magnifying method, used to cover the entire stage.
ii. Zoom Tool: Used to enlarge the stage region.Stages of Flash Tool
The phase is the primary working area of flash, and all of your compositional features are organized (film videos, switches, animation and so on). Content in the center of the cabinet can be seen when the flash film is produced. The gray backdrop is’ off-stage’ outside the center panel. You can animate material on the primary phase region from the outset or use a bigger backdrop picture than the primary point as if the camera is swinging over a backdrop. The stage has several contexts that are shown at the top of the stage. It may display contents that are in a scene or sub-content, such as library objects. By disabling/on the pasteboard (View > pasteboard), you can demonstrate and hide the things exceeding your scale.
Properties of Flash ToolIn order to change the toolbar you choose or which item you have chosen on the panel, the Properties tab shifts. In this tab, every object and tool has its own properties that can be adjusted. The Properties tab shows the document’s properties when you select the selection tool and click the stage background. You can specify the size, background color, frame rate and settings of your Flash file here.
Timeline and Frames of Flash ToolIn a flash, as in Photoshop, we put all content into layers. The same tools exist for creating a new layer, removing a layer, and building layer folders. The main difference is that content has to be placed on a timeline in a keyframe. Keyframes (contents or text) are timeline files that include data. An empty circle indicates content with fewer keyframes; content keyframes have a complete circle.
To start incorporating contents (when creating a fresh sheet, you always have a void keyframe in framework 1), you can right-click on the time-line for a particular section and pick the Insert Blank Keyframe. To attach the material to that picture, click a void or void keyframe in the schedule.
A keyframe only lasts for a frame (if your film is 30 frames per second, 1/30 a second). To extend a keyframe length, right-click on a frame and select’ Insert frame’ further down the timeline. The frames can also be selected, dragged, copied and pasted. Please be aware that you must select it first to perform any operation on a frame.
-
2Module 1 Quiz10 questionsThis lesson is locked because you haven't completed the previous one yet. Finish the previous lesson to unlock this one.
-
3How to Sketch Characters or Objects and Adding Color to Objects in Adobe Animate31 minutesThis lesson is locked because you haven't completed the previous one yet. Finish the previous lesson to unlock this one.
Draw curves with the Pen tool
To create a curve, add an anchor point where a curve changes direction and drag the direction lines that shape the curve. The length and slope of the direction lines determine the shape of the curve.
Curves are easier to edit and your system can display and print them faster if you draw them using as few anchor points as possible. Using too many points can also introduce unwanted bumps in a curve. Instead, draw widely spaced anchor points, and practice shaping curves by adjusting the length and angles of the direction lines.
1. Select the Pen tool.
2. Position the Pen tool where the curve is to begin, and hold down the mouse button. The first anchor point appears, and the Pen tool pointer changes to an arrowhead. (In Photoshop, the pointer changes only after you’ve started dragging.)
3. Drag to set the slope of the curve segment you’re creating, and then release the mouse button. In general, extend the direction line about one third of the distance to the next anchor point you plan to draw. (You can adjust one or both sides of the direction line later.)
Hold down the Shift key to constrain the tool to multiples of 45°.
4. Position the Pen tool where the curve segment is to end, and do one of the following:
i. To create a C-shaped curve, drag in a direction opposite to the previous direction line and release the mouse button.
ii. To create an S-shaped curve, drag in the same direction as the previous direction line and release the mouse button.
5. To create a series of smooth curves, continue dragging the Pen tool from different locations. Place anchor points at the beginning and end of each curve, not at the tip of the curve.
i. To break out the direction lines of an anchor point, Alt-drag (Windows) or Option-drag (Macintosh) direction lines.
6. To complete the path, do one of the following:
i. To close the path, position the Pen tool over the first (hollow) anchor point. A small circle appears next to the Pen tool pointer when it is positioned correctly. Click or drag to close the path.ii. To leave the path open, Ctrl-click (Windows) or Command-click (Macintosh) anywhere away from all objects, select a different tool, or choose Edit > Deselect All.
Pen tool preferencesSpecify preferences for the appearance of the Pen tool pointer, for previewing line segments as you draw, and for the appearance of selected anchor points. Selected line segments and anchor points use the outline color of the layer on which the lines and points appear.
1. Select the Pen tool , then select Edit > Preferences (Windows) or Animate > Preferences (Macintosh).
2. In the Category list, select Drawing.
3. Set the following options for the Pen tool:
i. Show Pen Preview: Previews line segments as you draw. A preview of the line segment appears as you move the pointer around the Stage, before you click to create the end point of the segment. If this option is not selected, a line segment does not appear until you create the end point.
ii. Show Solid Points: Displays selected anchor points as hollow and deselected anchor points as solid. If this option is not chosen, selected anchor points are solid, and deselected anchor points are hollow.
iii. Show Precise Cursors: Specifies that the Pen tool pointer appears as a cross-hair pointer rather than the default Pen tool icon, for more precise placement of lines. To display the default Pen tool icon with the Pen tool, deselect the option.
4. Click OK.
-
4Module 2 Quiz10 questionsThis lesson is locked because you haven't completed the previous one yet. Finish the previous lesson to unlock this one.
-
5Lip Synching in Adobe Animate (How to get our animation to talk)25 minutesThis lesson is locked because you haven't completed the previous one yet. Finish the previous lesson to unlock this one.
-
6Module 3 Quiz10 questionsThis lesson is locked because you haven't completed the previous one yet. Finish the previous lesson to unlock this one.
-
7How to Use Text Effect in Adobe Animate19 minutesThis lesson is locked because you haven't completed the previous one yet. Finish the previous lesson to unlock this one.
-
8Module 4 Quiz10 questionsThis lesson is locked because you haven't completed the previous one yet. Finish the previous lesson to unlock this one.
-
9How to Export Adobe Animate file to Video (Mp4)4 minutesThis lesson is locked because you haven't completed the previous one yet. Finish the previous lesson to unlock this one.
-
10Module 5 Quiz10 questionsThis lesson is locked because you haven't completed the previous one yet. Finish the previous lesson to unlock this one.


