Premiere Pro Tutorial for Beginners – Everything You NEED to KNOW!
- Description
- Curriculum
- Reviews
Welcome to my new BEGINNERS Masterclass for Premiere Pro! In this course, I will be showing you everything you need to know as a beginner about adobe premiere pro video editing. We’re going to have a lot of fun learning Premiere Pro from scratch as I take you through an actual project from start to finish. This Masterclass will go fast. You will feel so empowered as you exit out of here, an hour from now, as a master video editor.
Learning Objectives
1. understand terminology used in video editing
2. create, edit, and combine sequences
3. edit and combine audio, video, and still images
4. create titles and credits for videos
5. publish a video to a format suitable for web use
Prerequisite Skills
1. Use a mouse and keyboard
2. Work with basic video editing programs, such as the video editor in Photos on Windows or iMovie on MacOS
-
3
 How To Import A Video To Premiere Pro Interface and How To Do Quick Cut and Join of VideosThe easiest way to import video files is just by dragging them from the explorer (or finder if you’re using a Mac) to the program panel. Another way you can import is by using the import option in the menu of Premiere Pro. And the last way is by double-clicking in the program panel. Keep in mind that Premiere doesn’t support all files types. Videos that have a .mkv extension will cause an error when being imported, so you’ll have to find a way to convert those files to either .mov or .mp4 files. Those are always supported by Premiere.
 -
4
 Module 3 Quiz
-
5
Premiere Pro Essentials - Class Projects 01Class Project 01 - Basic Editing 1. Add 2 files to your project and edit them using the razor or dragging method. 2. This project does not require any submission... Just do and practice it. 3. Let me know on social media that you have started the Premiere Pro Essential Course; a. Use the tag #PremiereProMasteryVault b. Instagram: @MasteryVault c. Twitter @MasteryVault d. Facebook: Mastery Vault e. LinkedIn: Mastery Vault
-
6
Premiere Pro Essentials - Class Projects AnswerClass Project 01 - Basic Editing 1. Add 2 files to your project and edit them using the razor or dragging method. 2. This project does not require any submission... Just do and practice it. 3. Let me know on social media that you have started the Premiere Pro Essential Course; a. Use the tag #PremiereProMasteryVault b. Instagram: @MasteryVault c. Twitter @MasteryVault d. Facebook: Mastery Vault e. LinkedIn: Mastery Vault
-
7
Animations and Keyframing in Premiere ProTo animate a property is to change its value over time. In Premiere Pro, effect properties can be animated by assigning keyframes to them. A keyframe marks the point in time where you specify a value, such as spatial position, opacity, or audio volume. To create a change in a property over time, you set at least two keyframes—one keyframe for the value at the beginning of the change, and another keyframe for the value at the end of the change. Premiere Pro then creates a gradual change in values between keyframes, called interpolation. You can work with keyframes either In the Timeline or in the Effect Controls panel.
-
8
Module 5 Quiz
-
9
Adding Transition Effects To Videos In Premiere ProTo apply the default video transition on the Mac press Command+D. To apply the default video transition on Windows press Control+D. Applying the default audio transition is simple, for Mac click Shift+Command+D or for Windows press Shift+Control+D. Finally, to apply both video and audio transitions to the clip simply press Shift + D on both Mac and Windows.
-
10
Module 6 Quiz
-
11
Improving Audio Quality of A Video in Premiere ProWhat you learned: Add clarity and reshape the sound of vocals. Begin by reviewing your vocals. Assign the Dialogue audio type. Adjust the Dynamics slider. Enabling Dynamics applies an audio effect to the clip. Apply the Parametric Equalizer effect. Reshape audio.
-
12
Removing Noise and Hisses in A Video or Audio Using Wavepad Sound EditorYes, Wavepad can remove the hiss from the audio file. Click the Cleanup button on the Effects tab toolbar. Select Noise reduction from the submenu. Select Multi-band Noise Gating.. from the Noise reduction submenu. Select the Remove Hum and Hiss preset. Click OK.
-
13
Enlarging Audio Waveform in Premiere ProHow to Show Audio Waveforms in Premiere Audio waveforms provide you with a visual read of what you can expect to hear. Displaying audio waveforms will certainly make your workflow faster (locating audio clips, project navigation, etc), and is especially handy when making precise edits or processing audio. To view audio waveforms in Premiere, open the ‘Timeline Display Settings’ menu (wrench icon under the Timecode Display) and check ‘Show Audio Waveform’. You can then enlarge the waveform by simply hovering over the bottom border of the audio track and dragging vertically. Additionally, double clicking the audio file will open a larger view in the Source Monitor.
-
14
Module 7 Quiz
-
15
Adding BackGround Track To A Video In Premiere ProBring background music into your video from anywhere with Adobe Premiere Rush mobile app. 1. Tap the + icon in the bottom menu. 2. Tap the Media button to find songs on your device. ... 3. Pick the tune you want, and tap Add. 4. The track will appear in your timeline where you can edit it using the tools in the Audio menu.
-
16
Module 8 Quiz
-
17
Applying Text Effects To Videos In Premiere ProHow to add text in Adobe Premiere Pro 1. Select the Type Tool which uses the capital letter T on the timeline. ... 2. A text box will be created on the video and a graphic layer will appear on the timeline. ... 3. You can choose the duration of the text layer by just dragging it to the left or right.
-
18
Module 9 Quiz
-
19
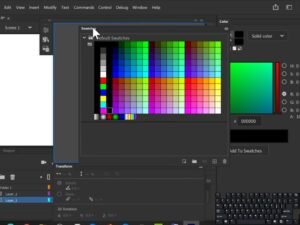
How to Color Correct in Adobe Premiere Pro (Basic Correction + Lumetri Scopes Tutorial)How do you do basic Color correction in Premiere? In the Effects panel, click the triangle to expand the Video Effects bin, and then click the triangle to expand the Color Correction bin. Drag the Fast Color Corrector effect or the Three-way Color Corrector to the clip in a Timeline panel.
-
20
Module 10 Quiz